by Cindy on February 2, 2013
A month ago, Tracy issued a jewelry-making challenge and blog hop – one with a great twist, a positive twist. In Tracy’s words, “It involves choosing a powerful word or phrase that is meaningful to you and incorporating it into a jewelry design that will serve as a reminder to make a positive change in your life. This challenge has an introspective component and a hands on component.”
Our challenge was to create a piece of jewelry that incorporates our inspirational word for 2013. You may remember that I chose a word and shared it in this post. My guiding word for 2013 is INTENTIONAL. Rather than just letting things happen, I want to make intentional decisions and intentional actions. Action versus reaction. I want to make good choices and make the most of my time. I know it is a lot to strive for, but it is a great word to guide me.
I got to thinking about how I could incorporate my guiding word in a piece of jewelry. I considered how long the word happens to be…. Hmm. Around this same time, an upcoming class came to mind. The class features a charming button, created with a lampwork cabochon and a stamped metal disc (I could stamp my word on the disc!). My friend Kerry Bogert is teaching this class, “The Wrap on Buttons“, this year at both Bead and Button and artBLISS. I asked Kerry if she would give me the skinny on how I could make one of these bracelets, and luckily she was generous with the how-tos. I think I may have provided a great trial run for her, between my bouts with leaking resin and working with the wrong type of cord (too stiff!). I learn best when I can actually see the instructions in progress, and Kerry was kind enough to text pictures to me showing some of the critical steps.
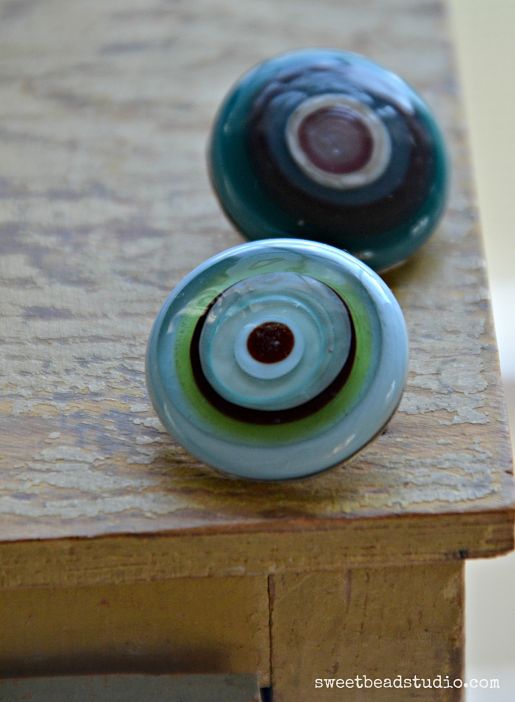
Here are the beautiful KABS cabochons that I happened to have already, waiting for just the right inspiration!
I stamped my guiding word on one metal disc, and the date on the other.
I’m so happy with how the bracelets turned out; I’m crazy about wrap bracelets. However, next time I will use
C-Lon instead of waxed cotton for the herringbone weave!
Thank you, Tracy, for this opportunity to reflect on my word of the year, and create new pieces of jewelry all at the same time. Learning a new technique was the icing on the cake. If you ‘d like to create a piece of jewelry with your own word-stamped button, please consider taking “The Wrap on Buttons” later this year.
To see what others have created for the Wellness Word Challenge, please visit these participating jewelry desigers:
by Cindy on February 2, 2013
Here we are, Week 5 of Sally Russick’s Focus on Life photo challenge. This week’s prompt is “Capture our hearts”. I am a big fan of heart motifs, sentimental as I am. I thought I’d easily find a heart to capture – maybe in a pattern or the kid’s artwork. Instead, I ended up making a heart!
Recently my friend Jeanette shared a link with me for a brownie recipe. Jeanette is a great inspiration for healthy eating, so these were no ordinary brownies. The recipe called for all natural ingredients – and is vegan and gluten free. Now as you may know, my oldest son loves to bake so he was really intrigued to make these brownies on his day off from school the other day. He mixed quinoa, dates and coconut butter in the blender. In to the oven it went and he was ready to frost it with a glaze when it came out. Corinne Goff’s Mocha Quinoa Brownies
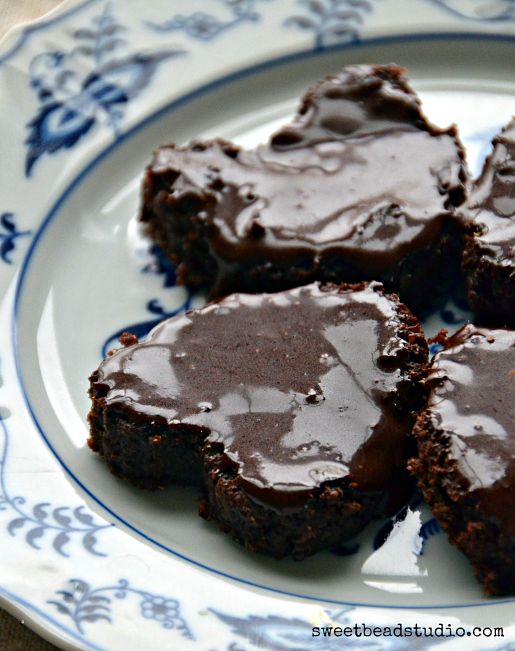
Yes, I cut them in to hearts because they are healthier-for-you brownies. Oh, I wanted to note that I omitted the coffee extract, doubled the recipe, and used a 9×9″ pan. The boys each wanted seconds….and when it came to the last one, I had to split it 4 ways between them! 🙂
– Cindy xoxo
by Cindy on January 30, 2013
Hello!
Today I am really excited to share with you designs that I created with Nina Designs components. As part of their Blog Partner Design Program, I was sent a generous stash of components.
I eagerly awaited the package from Nina Designs, not knowing what I would receive. I was really pleased when the envelope came in the mail. My package was full of natural bronze components as well as a couple of fiber bundles in leather and silk. Nina Designs is a fair trade company that has been around since 1983, and do they ever have an incredible reputation. I’ve been familiar with Nina components for quite some time and always admired the fine quality craftsmanship I see consistently. I think it is just incredible that all of their designs start with a sketch and are then fabricated by hand in both Indonesia and Thailand. You can learn more about their fair trade program here.

Here are the beautiful components that I received in the Blogging Partner Program!

I couldn’t resist using the Nina Designs Natural Bronze Tear Drop Link in an earring design. Creating these dangly earrings was super easy as I simply attached them to the bronze hook earwires that I received in my package. I added drops made with Sand Opal Swarovski crystals. When you click on the link to view these tear drop links, you’ll see additional design options on the website sidebar. I love all of the inspiration available on the Nina Designs website – from how-to videos to design ideas.
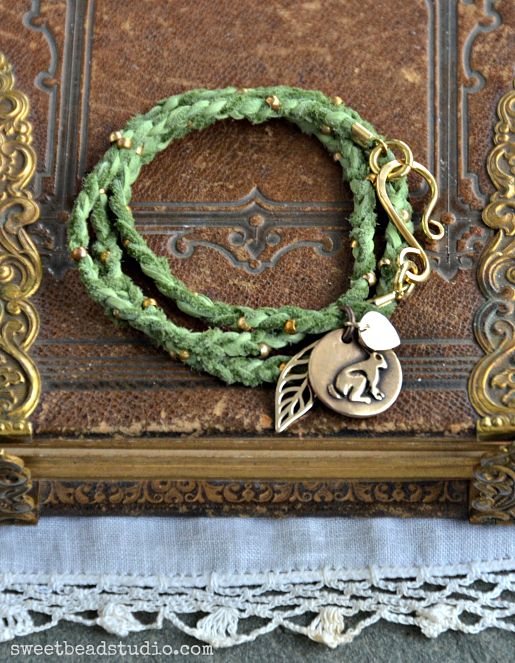
The leather cord in sage was the perfect choice for creating a wrap bracelet. I braided the 2 mm – wide cording in a length long enough to wrap around the wrist three times. I added a few dangles to the bracelet, including the Lotus Petal charm, the stylized Bronze Leaf charm, and my own bronze bunny charm made by LeAnn Weih of Summers Studio. A tumble-polished brass hook clasp gives the piece just the right hand-made touch.

I pulled together several of the Nina Designs components for my elegant but simple grand finale piece. Here you see how I used the dainty leaf-patterned toggle clasp – an easy way to finish off a jewelry design!

I created a charm holder with coiled brass wire and then added a bunch of Nina Design components. You’ll see I added a tiny Lotus Petal charm, a Natural Bronze Coral Branch charm, and the Infinity Link. I dangled a little coral rondelle to tie in with the branch charm.

What fun! I’m grateful for this chance to design using such intricate and beautiful components, from a company that I respect. Please visit their site and see all the many ways you can add Nina Designs components to your handmade jewelry too. Thank you, Nina Designs!
– Cindy xox0
The materials above were provided as part of the Nina Designs blogging program. The author of this blog has not received any payment from above-mentioned company. The post above represents only personal opinion of the blog author.


 Follow Me on Pinterest